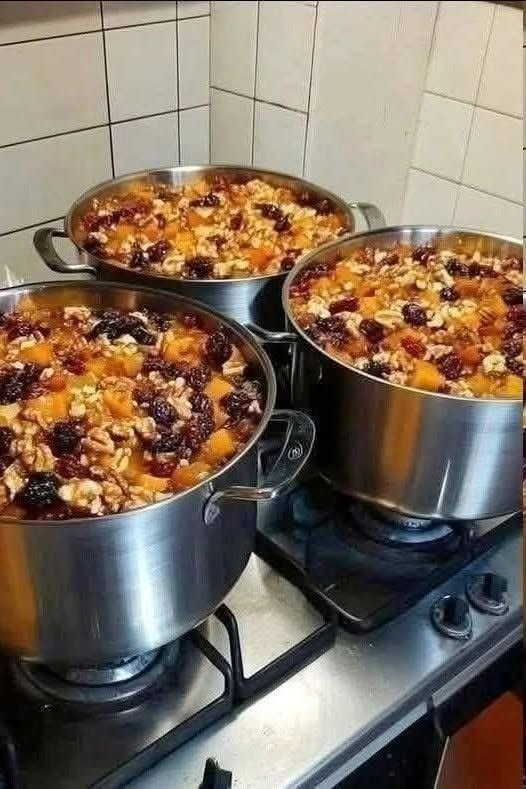
Step 1: Make the Syrup
In a medium saucepan, combine piloncillo, water, cinnamon sticks, cloves, star anise, and orange peel (if using). Bring to a boil, then reduce heat and simmer for 20–25 minutes until slightly thickened and fragrant. Remove from heat. Remove whole spices (or leave them in for presentation—just warn diners). Set aside.
Step 2: Toast the Bread
In a large skillet, melt butter over medium heat. Add bread slices in batches and toast until golden on both sides. This step is crucial—untoasted bread will turn to mush.
Step 3: Layer the Capirotada
In a 9×13-inch baking dish, layer as follows:
Toasted bread slices, slightly overlapping
Sprinkle wit cheese, raisins, nuts, and coconut (if using)
Repeat layers until all ingredients are used Cooking& Recipes
Finish with a layer of cheese and nuts on top
Step 4: Pour the Syrup
Slowly pour the warm syrup evenly over the entire dish, ensuring all bread gets soaked. Press down gently with a spatula to help absorption.
Step 5: Rest (Crucial!)
Let the dish sit for 30 minutes before baking. This allows the bread to absorb the syrup properly.
Step 6: Bake
Preheat oven to 350°F (175°C). Cover with foil and bake for 30 minutes. Remove foil and bake another 10–15 minutes until golden and bubbly.
Step 7: Rest and Serve
Let rest for 15–20 minutes before serving. Capirotada can be served warm, at room temperature, or even cold—each way is delicious.
Symbolism (During Lent)
Ingredient Symbolism Cooking& Recipes
Bread Body of Christ
Syrup (piloncillo) Blood of Christ
Cloves Nails of the cross
Cinnamon sticks Wood of the cross
Cheese Holy Spirit or divine goodness
Raisins / dried fruit Wounds of Christ or the sweetness of faith
Nuts The passion and sacrifice
Every family’s version carries its own meaning, passed down through generations.
Pro Tips for Perfection
Don’t rush the syrup – The 20–25 minute simmer develops deep, complex flavor.
Toast bread thoroughly – Golden, crispy edges are your goal.
Let it rest before baking – That 30-minute rest ensures even syrup absorption.
Layer generously – Each layer should be visible and abundant.
Watch the bake – Covered steaming melds flavors; uncovered baking creates a beautiful top.
Serve with love – Capirotada is meant to be shared.
Regional Variations
Region Characteristics
Central Mexico Banana slices and coconut; sweeter, fruitier
Northern Mexico More savory, less sugar, more cheese (sometimes meat) Meat& Seafood
Jalisco style Includes peanuts, sometimes a splash of tequila in the syrup
Michoacán style Fresh goat cheese, often plantains
Modern twists Chocolate, espresso, or a splash of rum
What to Serve Alongside
Mexican hot chocolate (classic pairing)
Café de olla (Mexican spiced coffee)
Vanilla ice cream (warm capirotada à la mode)
Fresh fruit (bright contrast)
Nothing – it’s perfect on its own
Storage and Reheating
Refrigerator: Airtight container for up to 4 days. Flavors deepen and meld beautifully.
Reheating:
Oven: 325°F for 10–15 minutes, covered
Microwave: Individual portions, 30–60 seconds
Stovetop: Gently warm in a covered skillet
Capirotada is even better the next day. Make it ahead for best results.
Can I make this dairy-free?
Yes, though not traditional. Use vegan butter and dairy-free cheese. Texture will differ.
Can I use a different cheese?
Traditional choices: queso fresco, asadero, or Monterey Jack. Avoid very sharp or aged cheeses—they overpower.
My bread turned to mush. What went wrong?
Either the bread wasn’t toasted enough, or too much syrup. Next time, toast thoroughly and measure syrup carefully.
Can I add meat? Meat& Seafood
Some regional versions include ground beef or chorizo, turning it into a savory main dish rather than dessert.
Is this served warm or cold?
Both! Delicious warm, at room temperature, or cold the next day.
Can I freeze capirotada?
It freezes reasonably well, though texture may change. Freeze in portions, thaw in refrigerator, and reheat gently.
For Complete Cooking STEPS Please Head On Over To Next Page Or Open button (>)
For Complete Cooking STEPS Please Head On Over To Next Page Or Open button (>)

Just a teaspoon, suddenly the orchid miraculously blooms with lots of flowers

This is how to have geraniums full of flowers: you have to water them like this to keep them always leafy.

Just 1 tablespoon in the morning loosens “stuck stool” and reduces belly bloat!

My nana swears by this DIY weed killer recipe. Here’s how it works

My dad showed me how to make these packet meals when money was tight. Just 4 ingredients for a perfectly tender individual feast